15. Data Transfer Request
15.1. Scenarios (When should I use his feature)
Data shall be imported into Agora from a machine that is not connected to the Agora server.
Data shall be transferred from one Agora instance to another (cross-site collaboration).
15.2. Prerequisites
Both the sender machine and receiving Agora server require outgoing https connections.
The sender can either transfer data from his Agora instance or use the standalone gtTransfer tool.
15.3. Usage
The data transfer process comprises the following steps.
The receiver creates a transfer request in his Agora.
The receiver contacts the sender and provides him the transfer request token.
The sender transfers files using the transfer request token.
The receiver downloads and / or imports the transferred files.
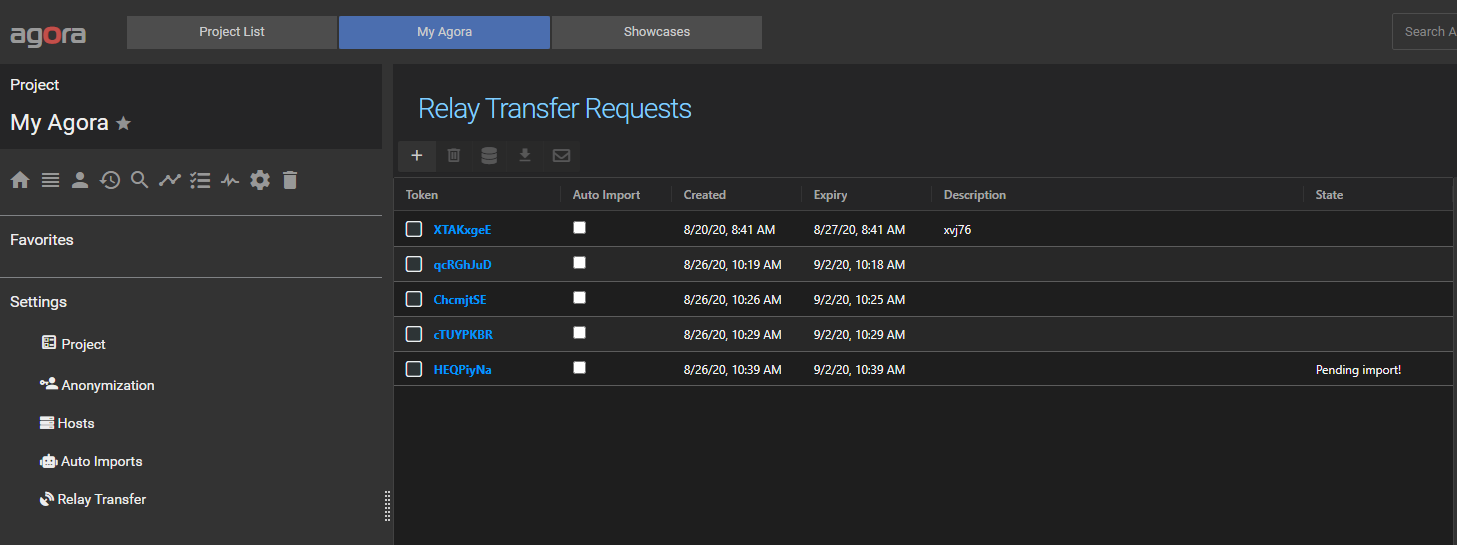
15.3.1. Creating a transfer request
Open the Agora project, you want the data to be transferred into (e.g. My Agora).
Navigate to the “Relay Transfer” table. It can be found in the project settings.
Create a new transfer request by pressing the button.
Configure the request and press the “Create Transfer Request”.
15.3.2. Providing the transfer request token
Each transfer request has a unique token, an eight character string. The token can be copied at any time from the transfer request table. The sender needs this token to be able to transfer files. An easy way to communicate the token is to send a mail directly from Agora: select the transfer request in the table and press the button.
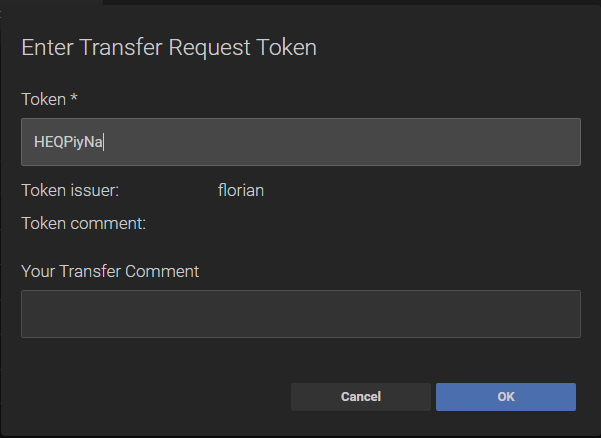
15.3.3. Transferring files from Agora
The sender can transfer files directly from his Agora installation.
Select the objects to transfer (studies, series, datasets, folders, files).
Press the button in the top-right toolbar to open the transfer dialog.
Enter the transfer request token in the dialog and press “Ok”
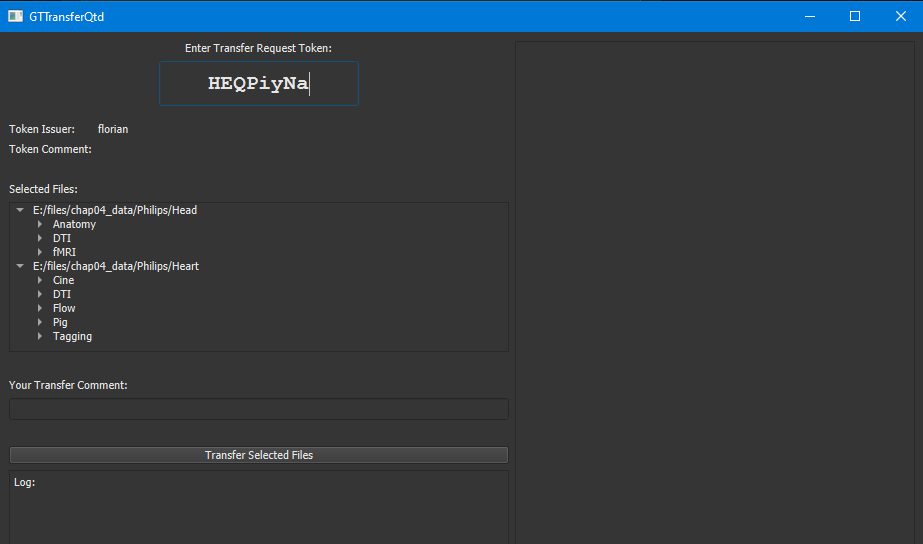
15.3.4. Transferring files with gtTransfer
The sender can also use the free and Agora-independent gtTransfer tool to transfer files.
Download gtTransfer from the GyroTools website. It’s free and doesn’t require installation.
Enter the transfer request token.
Drag-and-drop the folders and files to transfer into the field underneath “Selected Files”.
Press the “Transfer Selected Files” button.
15.3.5. Import transferred files into Agora
Agora automatically notifies the receiver whenever new files have been transferred: a message is posted to the Agora notification center. Also, in the Relay Transfer table, the State column will show the text ‘Pending Import’.
To import the transferred files
Select the corresponding transfer request in the table.
Press the button.
The import will start and run in the background. Depending on the size of the transferred files, this can take a considerable amount of time. Please be patient.
15.3.6. Download transferred files
If for some reason you do not want to import the transferred data directly into Agora, you can download it to your local hard drive instead. You will still be able to import the data later on.
Select the corresponding transfer request in the table.
Press the button.
The download will start and run in the background. Depending on the size of the transferred files, this can take a considerable amount of time. Please be patient.